Add a Node on the LFG Dashboard
Seven steps from joining Discord to seeing your node live on the LFG Node Dashboard.
-
1
-
2
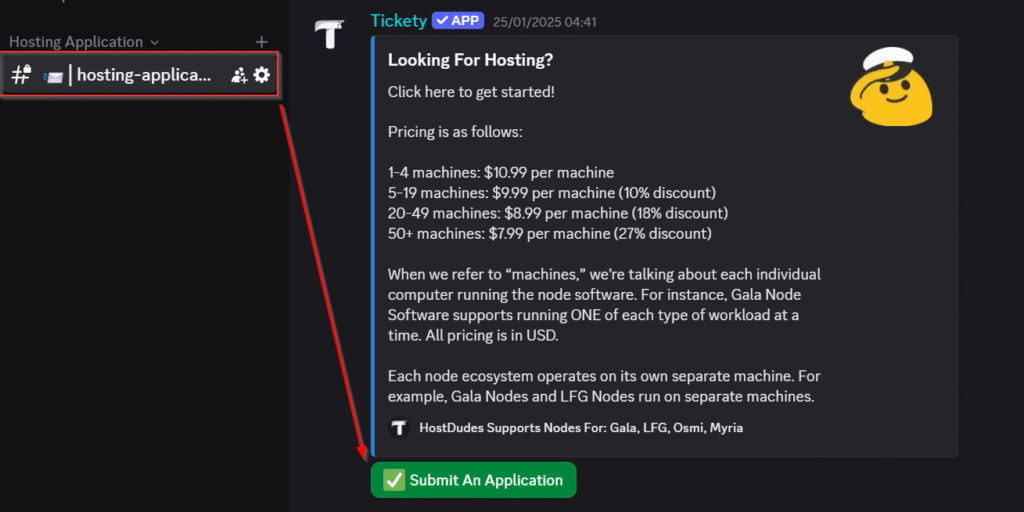
Submit an Application
Once inside, complete the verification process by clicking the Submit An Application button. Let us know the type of node you'd like to host, along with your billing email.

-
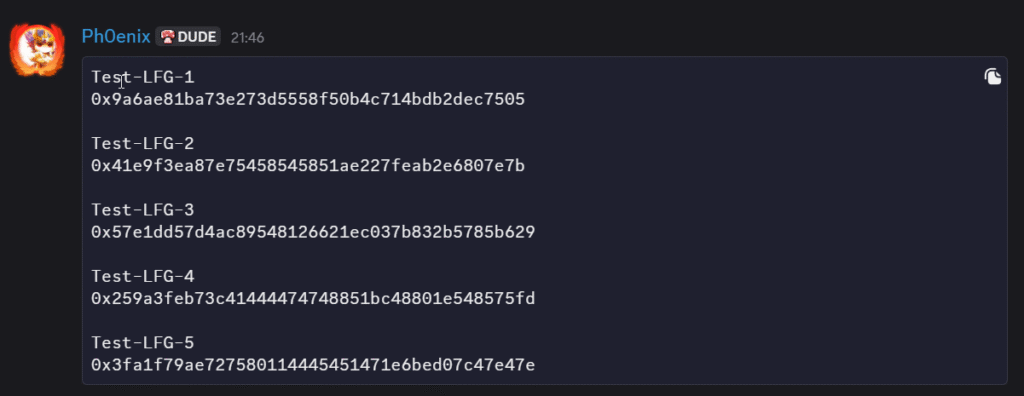
3
Getting your node(s) ready
We'll handle the setup of your machine, and once it's ready you'll get a message like the one below. Your nodes will then be ready to add to the LFG Node Dashboard.
-
4
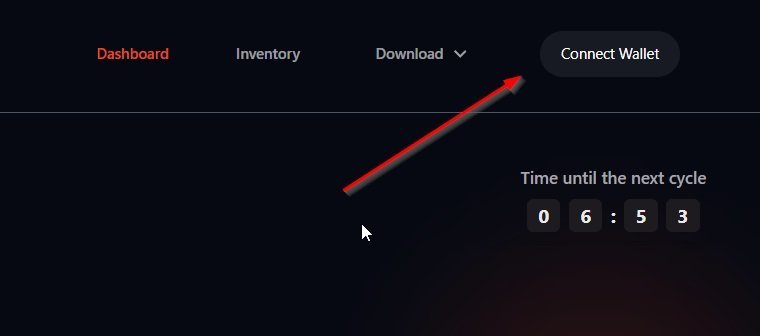
Connect your wallet
Visit the LFG Node Dashboard and click Connect Wallet at the top of the page, then follow the prompts to connect your wallet.
-
5
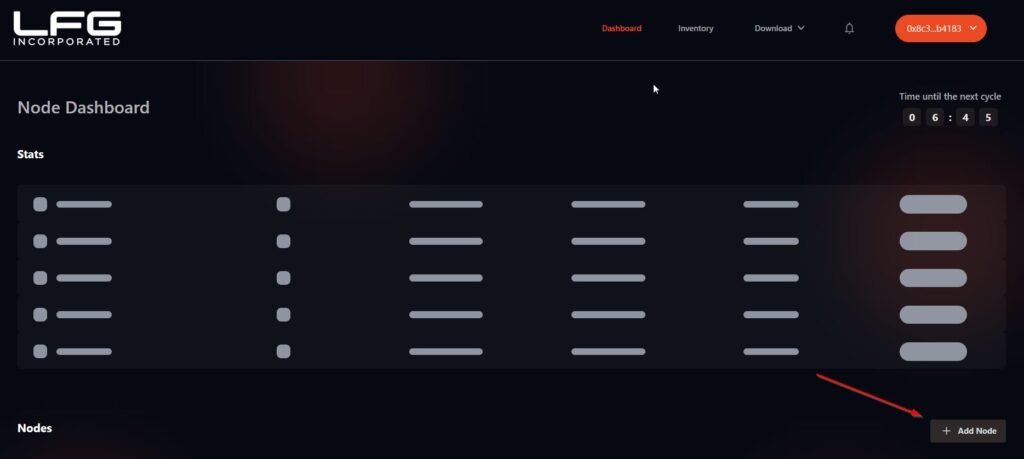
Add a new node
Once connected, click the Add Node button located at the bottom right of the page.
-
6
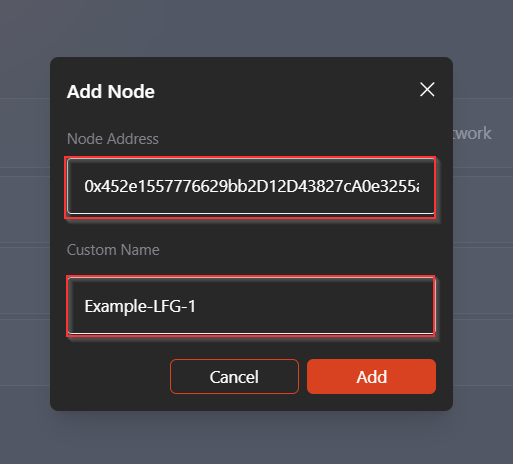
Enter the node details from Discord
- Node Address — provided to you in Discord.
- Node Name — you can choose your own, but we recommend using the one provided for easier tracking.
-
7
Confirm
Click the Add button to complete the process.
That's it.
Your node should appear online within about 10 minutes. If you run into any issues, reach out in Discord and the team will help you through it.
Ask in Discord